Here we will show you how to connect to a wireless network in Windows XP, Vista, 7 , Mac OS X. If you have already setup wireless on your router you will need to have your security key handy to input this. If you are still unsure you can call the helpdesk or email us on: support@suffolkonline.net
If you are using a laptop you may find the wireless is not on by default you will either have a switch located someone where on the laptop or need to use a key combination. If you are unsure of where this is then you will need to refer to the manual that came with your laptop.
Firstly ensure that your wireless on your laptop or desktop is switched on. On most computers or laptops it is by default but if it isn’t look for the physical switch on your computer or laptop or use the designate function key to switch it on.
Windows 7
Click on Start
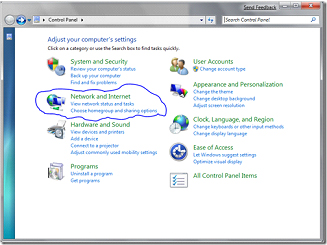
Click on Control Panel
Click Network and Internet
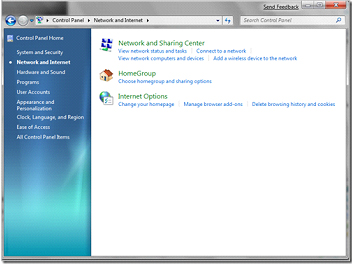
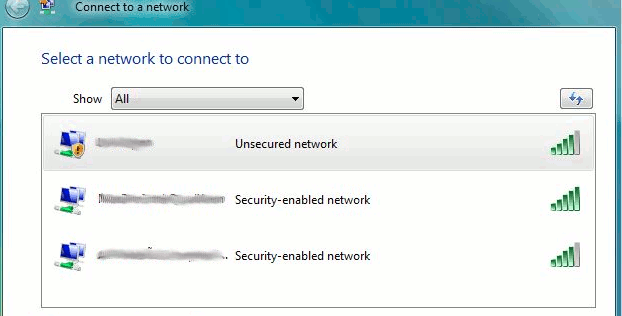
Click on Connect to a network (under the Network and Sharing Center menu) and it will bring up the screen below.
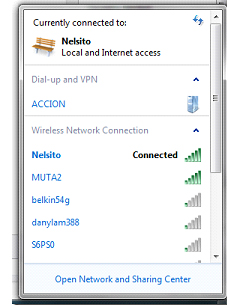
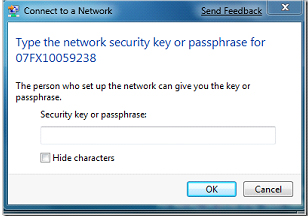
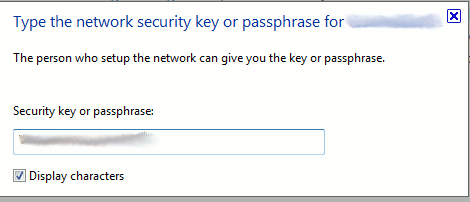
From here double click on “Netgear” from the list and then it will come up with the screen below asking you to type in the Wireless password (which will be on a post it note in your router package). If it doesn’t list Netgear it may be that your wireless is not switched on your laptop. Consult your manufacturers guide on how to do this.
Windows Vista
1. Click Start
2. Click Connect To
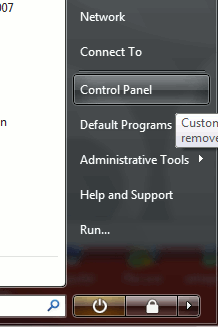
3. Under Wireless Network Connection look for the name you typed in to the Name (SSID) box in the Router section and double click on this.
4. You will then be greeted by a box asking you for your wireless password. Type the Key that you made note of in section 5. of the Router guide above.
6. Click connect
7. It should then try and connect and you should see the following screen below.
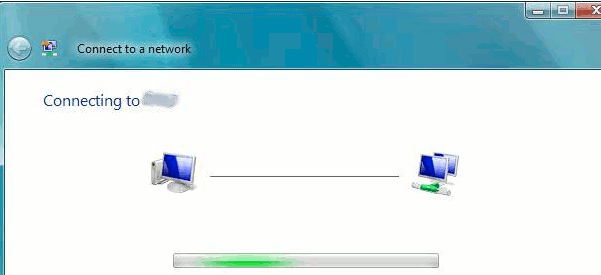
8. You should then receive a message to say that you are successfully connected. If it asks you to save all the information regarding the wireless network, select Yes.
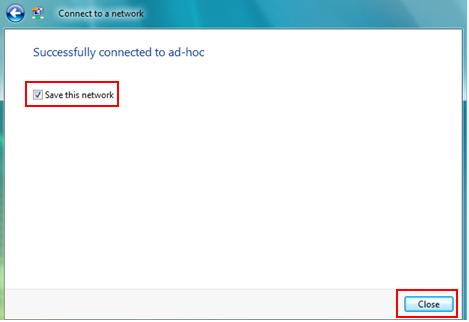
9. Click Close on any other boxes. This should mean you are now connected to your wireless network and you shouldn’t have to change anything again.
If at any time in the process Windows Vista asks you permission to continue please say yes. Also, if at any point in the process it asks you what type of network to choose “public” or “private”. If it does please select “private”
Windows XP
1. Click Start
2. Click Control Panel
3. Double Click Network Connections
4. Ensure that the wireless network connection is enabled. If it isn’t, right click on it and click Enable.
5. Right click over the wireless connection and click View Available Wireless Networks. You can also do the same thing
by right clicking over the wireless icon in the task bar over to the right hand side beside the time. It will either show a computer with green airwaves coming from it or like a signal bar. This will be only if you are using the built in windows software to connect to the wireless. If you are using some additional software you will need to refer to the manual for this.
i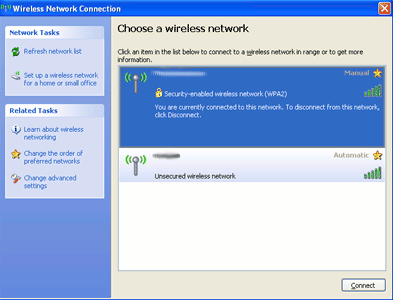
6. Left click on your network that you chose the name of in the Router section and click the connect button.
7. A box will come up asking for the network key. Type in the key that is under the Key 1 box that you made of a note when changing the router settings. Click connect.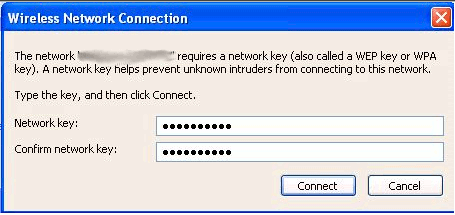
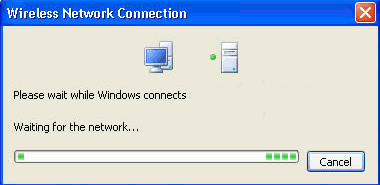
8. Once that has completed you should then be connected to the wireless network and you shouldn’t have to change anything again

